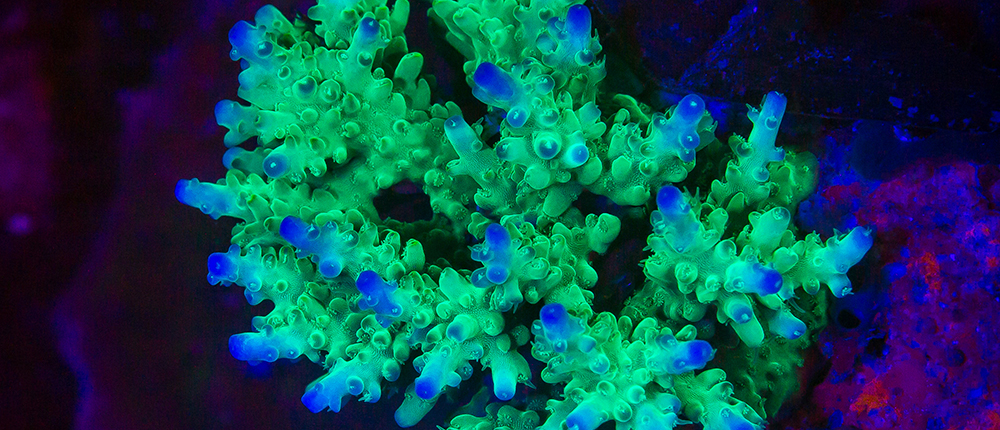
Adding The Glow
Combining fluorescent and luminance light sources adds a new dimension
to underwater imaging
At Wakatobi Resort, diving doesn’t stop when the sun goes down. In fact, many underwater photographers find nighttime to be prime time for creating unique images. Among the primary attractions of night diving are the colors. At first, this statement may seem counter intuitive, as the reef is cloaked in darkness. Sunlight may reveal the broader vistas of the reef, but as any underwater photographer can tell you, it does not render the full spectrum of colors, as red, orange and yellow wavelengths are lost even at relatively shallow depths. This changes at night. When we carry high-powered artificial lights, all wavelengths and colors are restored, making the reef look like a different place, vibrant with warm colors.
The ability to control the light source opens up a wealth of creative possibilities. A prime example of this is the growing popularity of the phenomenon known as Fluo diving, which exposes the unique florescent characteristics of certain animals and corals in glowing, neon-like hues reminiscent of the black light posters of the 60’s and 70’s. On a recent trip to Wakatobi Resort, Steve Miller had an opportunity to take fluorescence to a new level by adding additional conventional light sources that were altered with warming gels. This hybrid lighting technique yielded some intriguing results. Here’s how Steve describes the techniques and equipment he used to add luminance to produce the stunning images on this page.
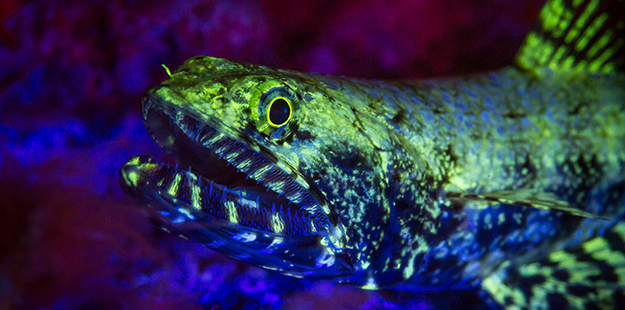
Using special lights and mask filters provided by Wakatobi’s Dive Center, divers and snorkelers can see the unique florescent characteristics of certain animals in glowing, neon-like hues, such as those radiating off this lizardfish. Photo by Steve Miller
The glow down below
Fluo diving as it is carried out at locations such as Wakatobi Resort is a relatively new practice, and the techniques of fluorescence photography are equally recent, although now well understood. First, you color your lights blue, either by using a blue LED light designed specifically for this purpose, or by using dichroic filters on your lights and strobes to produce this exclusively blue light.
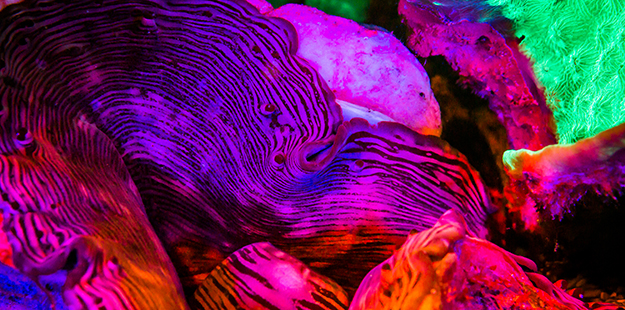
“An interesting aspect of the fluo diving experience is that the colors are so vivid they can be seen at greater distances,” says Steve. Photo by Steve Miller
From there, you place a yellow barrier filter on your camera lens or the housing port. Your camera will capture only things that are actively fluorescing. To be able to see the effect—and to find subjects—you will also need to place a barrier filter on your mask, Now, like your camera, you will only see things that are fluorescing… provided there are no white light sources around.
Disappearing acts
When fluo dives were first offered, they were conducted in a one-guest-per-guide situation, and rarely with cameras involved. Even skilled night divers benefit from a guide when engaged in fluo diving. Although you are seeing wonderful bright-glowing animals, anything that is not fluorescing—which is most of the reef—is almost invisible. This can present issues for the diver, as well as the underwater environment and its inhabitants. Divers are expected to avoid contact with the reef, and if we can’t see it there is a better chance of inadvertently bumping into coral or a camouflaged animal.
And even when contact is avoided, navigation and subject identification can remain a challenge. On a recent night dive at Wakatobi Resort, my non-fluo diving buddies signaled to me that they had found something I might want to see. An interesting aspect of the fluo diving experience is that the colors are so vivid that they can be seen at greater distances. I swam towards the group and went directly to a small patch of fluorescing hard coral that glowed bright green from 15 feet away. I later learned that on my way to the coral I’d swam right past a crocodilefish and a lionfish, and saw neither! Those were atually the subjects my friends had signaled me over to see, but since these fish were not fluorescing, they were almost invisible to me.
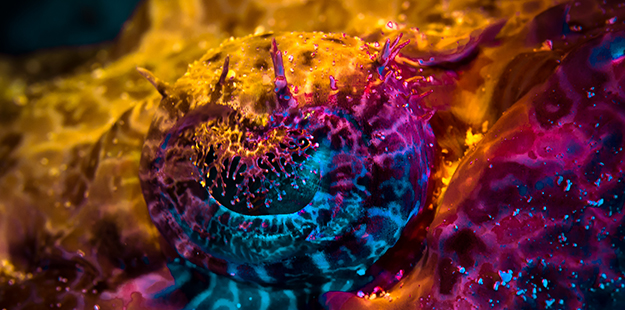
This crocodilefish eye was shot with two Ikelite strobes with blue dichroic filters and gamma lights fitted with gels in red, yellow and orange. Photo by Steve Miller
There are several ways to mitigate this issue. If you dive around dusk the remaining ambient light will allow you to see the shapes of the reef. Of course, this somewhat defeats the purpose of the shoot, as the darker it is, the more pronounced the fluo effect becomes. If you are a live-view shooter, or are using live view for video, then you can remove the color barrier on your mask, and just look at the camera for things that are fluorescing, although the “fluo experience” suffers a bit with this technique.
Another option would be to use an oversized yellow barrier filter on your camera housing’s port, positioning the yellow filter material to extend upward enough for you to sight over the housing and look through the barrier to know what is fluorescing. Again, this diminishes the overall fluo experience, but it provides a compromise that allows you to see where you are going.
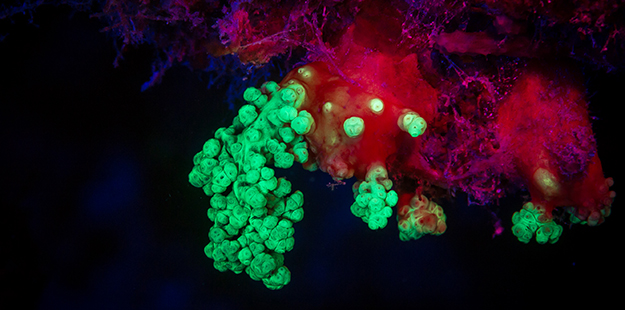
The bright green soft coral is the only thing that is actually fluorescing. Combining light sources restores the lost details of the reef while still showcasing fluorescent effects. Photo by Steve Miller
Lastly, and in my opinion the best solution, is to add luminance to the imaging equation. Though I can’t put an exact number on the phenomenon, fluorescent colors seem to travel great distances through the water. If I point my blue wavelength light at a fluorescing coral, I see the resulting bright green splash of color from much farther away than I would if a red coral were hit with white light. When using fluo lighting alone, this results in images where much of the scene both close and far is missing, because there is no fluorescence. By combining light sources, you can restore the lost details of the reef while still showcasing fluorescent effects.
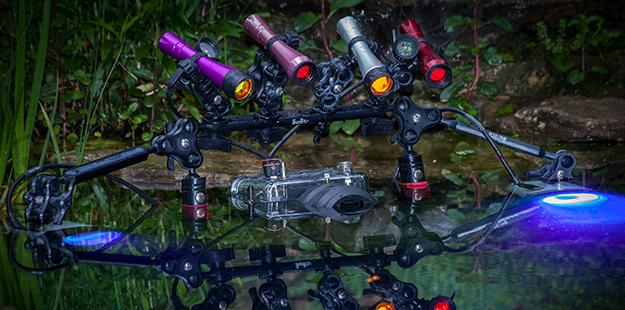
Steve adds blue dichroic filters accompanied by 4 gamma lights fitted with gels in red, yellow, and orange, to further accentuate fluorescing marine life. “When the flash goes off the light emitted is blue as it passes through a dichroic filter; this the first step in fluorescence shooting,” he says. Photo by Steve Miller
More lights, more colors
Adding luminance to your fluo kit involves attaching a number of additional light sources to your camera setup, which are typical fitted with various filters. The colors these lights produce will shift and become warmer as they pass through your barrier filters, but will produce the ambient light needed to navigate and find subjects, whether they are fluorescing or not. You can negotiate the reef with your luminance and fluo lights working together, then select a lighting strategy based on the subject. If it is fluorescing, you can turn off the luminance lights and shoot pure fluo. You can also combine the light sources to create new effects, or even shoot pure luminance. Think of your scene as a theatrical stage, and light it with a half dozen or so sources in various colors, each set and tweaked to suit the scene.
The images presented here were shot during a single night dive at Wakatobi Resort, with two Ikelite DS strobes set with blue Dichroic filters, accompanied by 4 Gamma lights fitted with gels in red, yellow, and orange. There are a wide range of colored gels available to experiment with, and as always, there are no rules so have fun experimenting.
Learn more about fluorescing corals at Wakatobi here.
Planning your next great dive vacation? Contact us at email office@wakatobi.com. Or complete a quick trip inquiry at wakatobi.com.
Visit us on Facebook.


